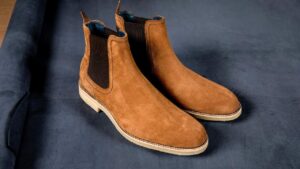
Suede sneakers look premium, but they also show wear fast. A little rain can leave water marks. A busy week can flatten the suede “nap” (the soft fuzzy texture). And one small scuff can make the whole toe box look dull.
The good news: you can restore suede sneakers at home in most cases—without special machines or expensive services. The key is doing it in the right order: dry → brush → erase → lift the nap → spot clean → protect. This guide walks you through a safe, proven method to restore suede on sneakers, remove common stains, and bring back that clean, even finish.
Quick Suede Restoration Checklist (2 Minutes)
Use this as your “do it now” list:
- Let sneakers dry fully (if they’re wet or damp)
- Dry brush to remove dust and lift the nap
- Use a suede eraser (or clean pencil eraser) for scuffs and shiny spots
- Light steam to revive flattened sued
- Brush again to reset texture evenly
- Spot clean stains using the right method (vinegar/alcohol/cornstarch)
- Finish with suede protector spray after drying
If you only remember one thing: never soak suede and never dry it with heat.
Can You Restore Suede Sneakers at Home?
Yes—most of the time.
You can usually clean suede sneakers at home and restore the texture if you’re dealing with:
- Dust and dullness
- Flattened nap / shiny patches
- Light scuffs and surface marks
- Water marks
- Dried mud
- Mild salt stains
Home restoration is harder (and sometimes not worth the risk) if you have:
- Deep oil/grease stains that spread
- Large faded patches (dye loss)
- Torn, bald, or cracked suede
- Heavy staining across multiple panels
If you’re unsure, do a small spot test in a hidden area (like near the heel) before doing the whole shoe.
What You Need to Restore Suede Sneakers
You don’t need a big kit. Start with the basics, then add optional products if your shoes are badly stained.
Core tools (most important)
- Suede brush (or crepe brush)
- Suede eraser (best) or a clean white pencil eraser
- Microfiber cloth
- White vinegar or rubbing alcohol (for water/salt marks)
- Cotton swabs (for small stains)
- Paper towels
- Shoe tree or stuffed paper to hold shape
Optional upgrades (helpful but not required)
- Suede/nubuck foam cleaner
- Suede/nubuck protector spray
- Suede/nubuck renew spray (color refresh)
What to avoid
- Hot water or soaking
- Harsh detergents or dish soap directly on suede
- Colored cloths (can transfer dye)
- Heat guns, hair dryers, radiators, direct sunlight
- Heavy scrubbing with stiff plastic brushes
Step-by-Step: How to Restore the Suede Sneakers at Home
This is the full process for suede sneaker restoration. Do it in order. Each step prepares the suede for the next.
Step 1 — Let Them Dry Fully (Do This First)
If your sneakers are even slightly damp, stop and dry them first. Brushing wet suede can push dirt deeper and create rough patches.
How to dry suede sneakers properly
- Remove laces.
- Stuff the shoes with clean paper (not newspaper ink-heavy pages).
- Let them air dry at room temperature.
Avoid
- Direct sunlight (can fade dye)
- Heaters/radiators (can stiffen suede and warp glue)
Real-world tip: If you got caught in rain and the toe looks darker than the side panels, don’t panic. Uneven drying often causes water marks. You’ll fix that later with the water-mark method.
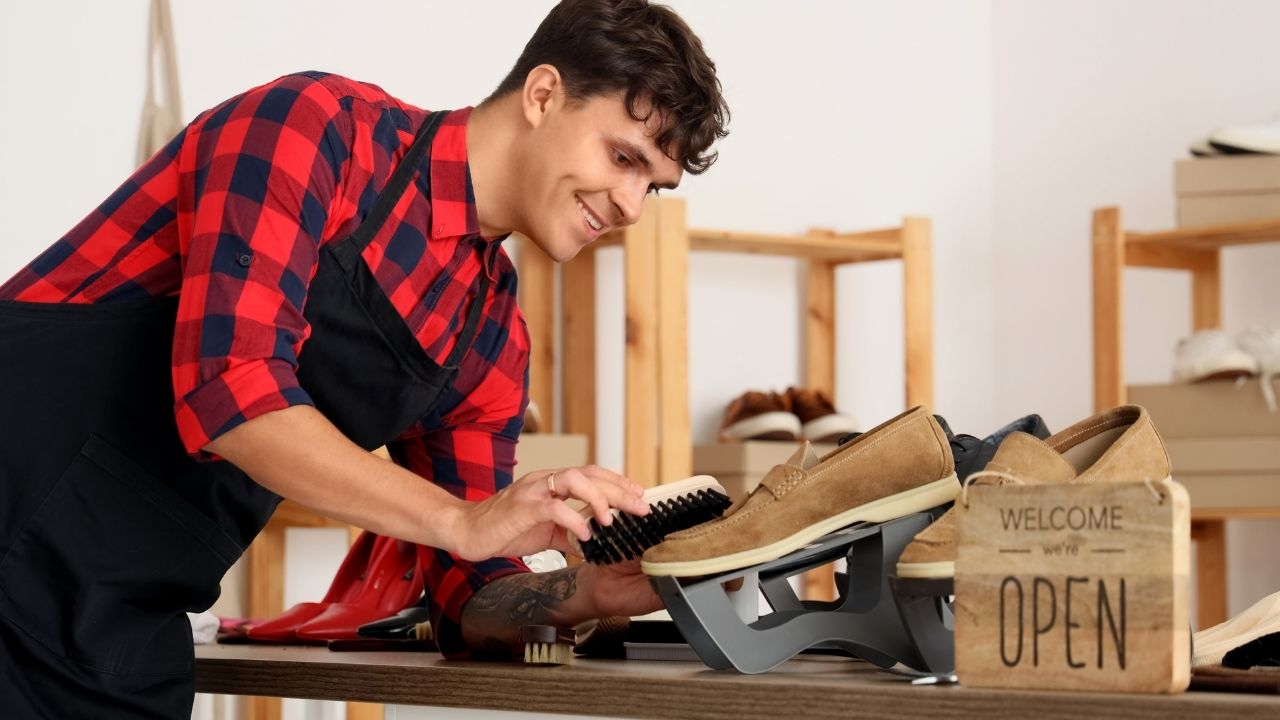
Step 2 — Dry Brush to Remove Dust + Bring Back Texture
Dry brushing is the foundation of restoring suede. It removes surface dirt and starts lifting the nap.
How to brush suede
- Brush in one direction first (light pressure).
- Then brush back and forth gently where the nap looks flat.
- Work panel by panel: toe, side, heel.
What you’re looking for
- A cleaner surface
- A softer, more even finish
- Less “shiny” reflection from flattened fibers
Pro tip: A suede brush often has two sides: softer bristles for general brushing and a tougher edge for stubborn scuffs. Start gentle. You can always increase pressure later.
Step 3 — Remove Scuffs and Shiny Spots (Eraser Method)
Scuffs on suede aren’t always “dirt.” Often, they’re compressed fibers. An eraser lifts that compressed layer.
How to use a suede eraser
- Rub the scuff gently in short strokes.
- Don’t press hard—let the eraser do the work.
- Brush the area afterward to lift the nap.
If you don’t have a suede eraser, a clean white pencil eraser can help for small marks.
Example: You bump your toe against a curb and the suede looks shiny and darker in one spot. That’s a classic eraser fix: erase lightly, brush, and the texture usually returns.
Step 4 — Use Light Steam to Lift Flattened Suede (Nap Reset)
Steam is one of the best ways to revive suede shoes when the nap looks dead or matted. The goal is gentle moisture in the air—not wet suede.
Safe steaming method
- Boil water and let steam rise, or use a garment steamer.
- Hold the sneaker well away from the steam (not close enough to get wet).
- Steam the area for a few seconds.
- Let it rest briefly, then brush to lift the nap.
Why it works
- Steam relaxes the fibers so brushing can lift them again.
Important: If you see droplets forming, you’re too close. Back up.
Step 5 — Spot Clean Stains (Use the Right Method)
This is where many people ruin suede. They treat every stain the same. Don’t.
The rule is simple: identify the stain type, then use the right method.
Before you start
- Spot-test in a hidden area.
- Work gently.
- Let it dry fully before judging results.
Step 6 — Final Brush + Edge Clean
After stain treatment, your suede may dry slightly stiff or uneven. A final brush makes it look uniform.
Final brush steps
- Brush all panels in a consistent direction.
- Use slightly firmer strokes where nap is still flat.
- Blend treated areas into untreated areas.
Edge clean (midsole and rubber)
- Use a separate cloth and mild cleaner for rubber.
- Keep rubber-cleaning products away from suede.
Tip: If you cleaned the midsole first and touched suede with a wet cloth, you can create new marks. Save rubber cleaning for the end.
Step 7 — Protect to Keep It Looking New
Once suede is restored, protect it. This is what keeps your work from disappearing after one wear.
How to apply suede protector
- Make sure sneakers are clean and fully dry.
- Spray from a distance in light, even coats.
- Let it dry, then do a second light coat if needed.
- Cure fully before wearing (check product directions).
Protection helps against:
- Water marks
- Salt stains
- Everyday dirt buildup
How to Remove Common Stains from Suede Sneakers
Use this section when you want stain-specific instructions for remove stains from suede sneakers—without damaging the texture.
Water Stains / Water Marks
Water marks happen when suede dries unevenly. You don’t “scrub” them out—you blend them.
Method (vinegar or alcohol)
- Lightly dampen a microfiber cloth with white vinegar or rubbing alcohol.
- Dab and gently wipe the water-marked area.
- Blend the edges outward so it dries evenly.
- Let dry fully, then brush.
Real-world example: One side of your shoe got splashed, and it dried darker. Light vinegar blending + brushing often restores an even tone.
Mud Stains
Mud looks scary, but it’s usually easy if you wait.
Method
- Let mud dry completely (do not wipe wet mud).
- Brush off dried dirt.
- Use an eraser for leftover marks.
- Brush again.
Why waiting matters: Wet mud smears and pushes grit deeper into suede.
Oil/Grease Stains
Oil is the hardest stain for suede. The goal is absorption, not rubbing.
Method
- Blot immediately with paper towel (do not rub).
- Cover the stain with cornstarch or baking powder.
- Leave overnight.
- Brush off powder the next day.
- Repeat if needed.
Tip: If the stain has been there for weeks, results may be partial. You can improve it, but full removal isn’t guaranteed.
Salt Stains (Winter Marks)
Salt stains often appear as white rings or crusty lines.
Method
- Lightly dampen cloth with white vinegar.
- Dab the salt lines gently.
- Let dry completely.
- Brush to restore nap.
Important: Use minimal moisture. Too much can create new marks.
Ink Stains (Hard Mode)
Ink can permanently damage suede dye. Try only on a tiny area first.
Method
- Dip a cotton swab in rubbing alcohol.
- Dab lightly—do not spread the ink.
- Change swab tips frequently.
- Stop if you see dye lifting heavily.
If ink spreads or dye lifts, it may need professional help.
How to Restore Suede Color on Sneakers (If They Look Faded)
Sometimes suede is clean and brushed, but it still looks tired because the dye has faded—especially on toes and heel edges.
When color restoration makes sense
- Shoes look “washed out” even after brushing
- The nap is restored but the tone is uneven
- There are light sun-fade patches
Options
- Suede/nubuck renew spray (best for even fading)
- Spot coloring is tricky and can look patchy—avoid unless experienced
How to use renew spray (general method)
- Clean and restore nap first.
- Mask rubber/midsoles with tape.
- Apply very light coats, building gradually.
- Let dry fully.
- Brush lightly to finish.
Expectation setting: Color sprays can slightly darken suede. That’s normal. The goal is an even, natural look—not a painted finish.
Mistakes That Ruin Suede Sneakers
If you want your restoration to look professional, avoid these common problems:
- Soaking suede in water (causes stiffness, marks, dye movement)
- Using soap/detergent directly on suede (can leave residue and dark patches)
- Scrubbing hard with a rough brush (creates bald spots)
- Heat drying (warps shape and hardens suede)
- Using colored cloths (dye transfer is real)
- Skipping protection spray (stains return quickly)
A good suede restoration is gentle. Fast and aggressive usually backfires.
When Home Restoration Isn’t Enough
Home methods work for most day-to-day wear, but some cases need a professional sneaker restorer or cobbler.
Consider professional help if you have:
- Oil stains that keep spreading or won’t lift after multiple absorbs
- Big discoloration patches (dye loss)
- Torn suede, bald patches, or cracked panels
- Damage from chemicals (cleaners, bleach, unknown products)
Trust tip: If the sneakers are expensive or rare, it’s safer to do minimal cleaning at home (dry brush + eraser) and avoid liquid treatments unless you’re confident.
Quick Care Routine to Keep Suede Clean
Once your sneakers look fresh again, this simple routine keeps them that way:
- Brush weekly (30 seconds per shoe)
- Erase small scuffs immediately
- Spot clean stains fast (don’t wait weeks)
- Reapply protector after deep cleaning or heavy wear
If you follow this, you won’t need a full suede sneaker restoration often—and your sneakers will stay sharp with less effort.
FAQs About Restoring Suede Sneakers at Home
Can I use toothpaste on suede?
Not recommended. Toothpaste can leave residue, lighten dye unevenly, and make the nap rough. Stick to brushing, erasing, and suede-safe spot methods.
Can I use a regular toothbrush?
Only in an emergency, and very gently. Many toothbrushes are too stiff and can damage suede fibers. A suede brush is safer.
Does vinegar damage suede?
Used lightly, white vinegar is a common method for water marks and salt stains. Always spot-test first and use minimal moisture.
How do I make suede fluffy again?
Use the sequence: dry brush → eraser (if needed) → light steam → brush again. This restores the nap for most suede sneakers.
How long should suede shoes dry?
Usually overnight at room temperature. Drying time depends on humidity, but air drying is always safer than heat.
What’s the best suede protector for sneakers?
Look for a suede/nubuck protector that repels water and stains. Apply after cleaning and let it cure fully before wearing.
Final Thoughts
Restoring suede on sneakers at home is totally doable when you follow the right order and stay gentle. Most “ruined” suede is really just dirty, flattened, or unevenly dried—and that can usually be fixed with drying, brushing, erasing, light steam, and proper stain treatment.
If you remember the basics, you’ll avoid 90% of mistakes:
- Dry first (never work on damp suede)
- Brush often (it’s the main restoration tool)
- Use an eraser for scuffs
- Treat stains by type (water ≠ oil ≠ salt)
- Protect after cleaning so stains don’t come back
And if the sneakers are expensive or have deep dye loss, torn suede, or heavy oil stains, it’s smarter to do minimal home care and get professional help.


![15 Biggest Things That Turn Women Off About Men [And How to Avoid Them]](https://mirrorbeat.com/wp-content/uploads/2026/03/Things-That-Turn-Women-Off-About-Men-300x169.jpg)